Kaleido by Silkie B.

Knitting Designs By Silka Burgoyne

A Close Call… April 23, 2011

Like I said in my previous post that I have not knitted anything for the past couple of months… so last week, I have decided that I should start looking at submitting design again and back to my knitting self… what I am not sure at this moment is to whether I should concentrate on publish pattern on the online magazine or on actual Magazine or just published my design as idie pattern for my own site….

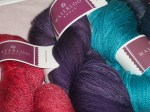
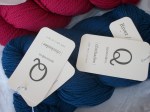
Anyhow, last week, I decided to start with something small… so I naturally decided on a pair of fingerless mittens.. as for yarn.. looking through my stash… I have a few skeins of tern by Quince and Co. already winded in varies color… so I chose one of the more subtle color and cast on… as for the design, I decided to choose a combination of eyelet cable and texture stitch.. the eyelet cable stitch will be featured in the arm and wrist area, eyelet rib as the divider, and the hand potion will feature a simple texture stitch…. After I finished the first fingerless mitten, I am loving the outcome of the design so much that I went ahead and work on the second mitten.. It might sound strange that I said ‘I went ahead and work on the second mitten’.. often time when I work on a submission, I will only work on a sample, so it is not unusual for me not to actually finish a pair of mittens or socks… in fact I have quite a few single mitten or sock laying around… Anyhow, as I was working on my second mitten, I suddenly realized that I might run out of yarn. For a designer, you should always calculate the amount of yarn needed for a project before starting to knit… so what happened to me then? That idea of running out of yarn did not even come across my mind… what a shame…

As I go further along with my second mitten, I saw the ball of yarn kept getting smaller and smaller.. it alarmed me. I just prayed that I would have enough yarn to finish it. I have a few idea in my head of course just in case if I ran out of yarn.. such as potentially work in a alternate color to create a stripe pattern for the upper potion etc… fortunately, I made it through… I finished my second mitten with less than a yard of yarn to spare… that’s a close call…..

Now my new fingerless mittens design has finished.. I just need to think a nice name for it.

I am not sure at this point in what I am going to do with this design.. so for now, I will not be posting any picture at this moment. All I can say is that I am extremely delighted with the result and loving the color and the yarn. Now I just need to create a matching cowl to go along with the mittens… it will be a nice set for the upcoming fall and winter season…

Advertisement
 

Victoria and Bonnie is available!! September 7, 2010

Just want to announce that the patterns for Victoria Gloves, Victoria Socks and Bonnie Mitts are available through my site, Ravelry and my etsy store. Simple go to my pattern link and click on the image for more information. I have also put Victoria Gloves and Socks as a set in a discounted price.

As always, if you have any questions regarding the patterns. Please feel free to contact me!

Happy Knitting!


Meeting Lindsey…… August 4, 2010

Filed under: General,Knitting Life — silkaburgoyne @ 2:10 pm
Tags: , , , , ,

When you think of yarn, wool will most likely be one material that come into most of the people’s mind…. wool indeed a common material that make into yarn… as yarn evolves through time… nowadays almost everything can make into yarn… alpaca, camal, soy, bamboo, cotton, silk etc are very common… then comes some items that I don’t think can be possible to make into yarn… think sugarcane, seacell and even milk… Milk? How could it be possible? I have my doubt until I actually touch a skein of yarn that is 80% milk fiber… looks and feels absolutely wonderful!

But I am here not to talk about yarn evolution, I am here to talk about meeting Lindsey Ligett.

A couple days ago, with a connection from Shirley, a lady from my knitting group, introduced me to her niece, Lindsey, who happened to be in town for a visit. Lindsey is the owner of Waterloo Wools, a small business that locates in Waterloo, Ontario that specialize in hand dyed, handspun yarns and spinning fibers. I enjoy working with all type of yarns, of course everyone should know that by now.. but I am totally clueless on how yarn is made. I always admire people that can spun and dyed their own yarns… and meeting Lindsey who specialize in those 2 things is such a wonderful experience for me.

During our meeting, Lindsey has graciously given me a few skeins of her hand-dyed yarns that I attached in this post. Don’t you think the yarns look amazing? Lindsey did such a great job on the colors and they are absolutely beautiful. Amongst my goodies, one of the skein is made with 80% Milk Fiber and 20% Merino Wool, one skein is made with merino wool and seacell.. and there is one that is made with merino wool and Tencel. Of course I can’t just take the yarns and not do anything with them. In return, I will put myself into the design gear (soon after I finished my other project commitment) and design a few items that will features the yarns that Lindsey has given me so that she can showcase her yarns in the trade shows that are coming up in the middle of September and late October in Canada. It is also a good opportunity for me as an indie designer to reach out to other knitters using a different channel. So please stay tune for my designs in the next couple months that features Waterloo Wools.

Thanks again to Lindsey for the beautiful yarn and I am truly grateful.


Got my quince & Co. July 28, 2010

Filed under: Knitting Life — silkaburgoyne @ 7:25 pm
Tags: , , ,

I have first heard about quince & Co. from brooklyn tweed facebook page. Then quince & Co. keep popping up everywhere. I went to the website and checkout the story behind the company and the yarn that the company offer. The first impression is the simpicity of the site. It’s clean.. easy to navigate… and to the point content…. it’s a true minimalist style…. then their products.. 4 different yarns in 4 different weights and a large selection of colors…. how can one resist?!?

My order arrived today… I ordered a skein of Osprey in rosa rugosa and a couple skeins of chickadee in river… can’t wait to get my hands on them… well…. have to wait after my last project deadline….


Preview Design for Kaleido Purse Vol. 2 July 20, 2010

Filed under: Kaleido By Silkie B. Design — silkaburgoyne @ 5:04 pm
Tags: , , , , , , ,

Bluzzy

If anyone follows my blog, you will know that I am currently working on the new collection of purses. With my friend, Annette, being my sample knitter, I have a swatch for my 1st design. It is going to be a felted tote… yes oh yes.. I am going back to my felting root on this one. The picture to the left provides a little preview on the main center motif for the tote… It’s different tones of blue; turquoise and the deepest navy… no surprise for the color choices here… blue being one of my favourite color. I wanted to play with simple line and shape to create interesting visual effect… it’s going to be bright and busy but I hope it’s in a good way. With a little bit of imagination and playing with different combination of colors, this will be one fun tote to knit.

Stay tune for the actual sketch for this tote… still thinking a good name for it.


Pattern Clarification – Retro Cropped Cardi


As I was reading the pattern from the Creative Knitting March 2010 Issue. I realized that the decrease from from body ribbing to main body need a little bit more explanation. It is mainly my fault for not putting a clear instruction on the pattern. In the magazine, it mentioned to decreaes 4 sts evenly for the body back and 2 sts for the body front while working on the row 1 of cable pattern. If you are more experience knitter, this is easily accomplished to work the dec when working on the pattern; however, it might get a little tricky. Hence I have put 2 other way of doing the decrease in this post.

There is 2 ways to work the decrease from body ribbing to main body:
1) When working on the last row of the ribbing (WS) descrease 4 sts evenly for the body back ribbing and 2 each for both front ribbing.
2) On the next RS row after ribbing, instead of working in cabled fabric pattern, work in stocknette st instead for first 2 rows and work decrease on first RS row. Start working on Row 1 of Cable Fabric pattern on 3rd row.

I have also gotten question about how to go about working the sleeves from top down. The pattern in the magazine was edited such a way that it actually left out some quiet important information for anyone who might be a relatively new to the knitting world and might not be familiar with certain steps. I would like to add more details on how to tackle the sleeves. The sleeves are worked using magic loop method. First, with RS facing up, you will pick up the the number of sts that is specified in the pattern. If you are working on size S, you will pick up 86 sts. To pick up, you will start with the one side of the underarm (back or front) bind off sts first then work your way up. What I normally do is to mark the shoulder position, then divide the total number of sts to 2, so you will know you need to pick up 43 sts on each side of the sleeves. It is important to pick up all BO underarms sts; that is, if you BO 5 sts when shaping the arm while working on the main body pieces, then you would pick up all 5 underarm sts when working on sleeves, then pick up a couple sts, then skip 1 st etc until you reach the center marker; work the same for the other side of the marker.

When shaping the cap, you are working the sleeves as if you are working on a flat piece. To start shaping the cap, the 1st row is actually a WS row because you pick up the sts on the RS. To shape the sleeve, we are using the short row technique. 1) so for the 1 WS row, you will work 58 sts, wrap & turn, 2) then work 30 sts on RS, wrap and turn. 3) On the next WS row, work to the previous wrap st, pick up the wrap and purl the wrap with the st, then wrap the next sts and turn. Repeat step 3 until there is only BO sts left.

To work Wrap&Turn,
1) work to the st you need to wrap, on the RS, bring the yarn to the front, slip the next st as to purl, then bring the yarn to the back, then bring the warp sts back to the left needle and turn and work the WS
2) work to the st you need to wrap, on the WS, bring the yarn to the back, slip the next st as to knit, then bring the yarn to the back, then bring the wrap sts back to the left needle and turn to work the RS

To work the wrapped st
1) WS, slip the wrapped st as to knit, use the left needle tip and pick up the wrap and bring the slip st back to the left needle, purl to the back loop of the slip st and the wrap together
2) RS, slip the wrapped st as to purl, use the left needle tip and pick up the wrap and bring the slip st back to the left needle, knit the slip and wrap together

shape the sleeve cap until only BO sts left on each side, then you will need to work in the round, make sure when working in the round, you are working on the RS. As the pattern for the sleeves, it will match the body, so you will work the pattern into the sleeve cap shaping. The pattern is the mulitiple of 6 sts, and if you are working on size S for example is 86 total sts and it’s not multiple of 6, what i would do is to work the number of sts that can be divide by 6 in pattern, and the rest, i would simple just knit it. Since it’s an overall cable pattern, so there is really no center point of pattern to line up, so the position of the cable is really not that important…

If anyone has any question regarding this pattern, please feel free to contact me!